Off-Road Essentials: Top 7 Upgrades for Your Jeep or Bronco in 2025
Transform your stock Jeep or Bronco with these essential off-road upgrades. From practical lift kits to life-saving recovery gear, discover what seasoned trail warriors actually use when the pavement ends.
Let’s be honest—nobody buys a Jeep or Bronco to keep it stock. That showroom-fresh 4×4 sitting in your driveway is basically begging for upgrades. I’ve spent more weekends than I care to admit turning wrenches and emptying my wallet to learn what mods are worth your hard-earned cash.
After countless trail rescues (both giving and—ahem—receiving), I’ve put together this no-BS guide to the gear that actually matters when you’re axle-deep in trouble, miles from cell service.
1. Lift Kits: The Height of Good Judgment
Nothing screams “I’ve arrived” quite like a freshly lifted rig. But before you max out your credit card on a monster truck setup, let’s talk practicality.
For most weekend warriors, a modest 2-3 inch lift hits the sweet spot. It’ll clear those 33″ tires you’ve been eyeing without making your significant other need mountain climbing gear just to get in. Your spine and wallet will thank you for the restraint.
If you’re the type who sees a boulder and thinks “challenge accepted,” then sure, go for that 4-inch lift. Just remember—the higher you go, the more your center of gravity shifts from “confident cornering” to “interesting physics experiment.”
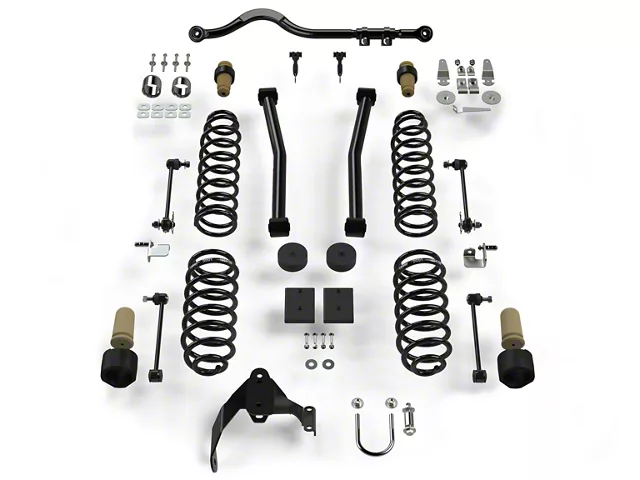
Teraflex 2.5″ Lift Jeep Wrangler JK Review
Pro tip: Skip the budget lift kits. That $800 Amazon special might look identical to the $2,000 name-brand option, but when you’re crawling across off-camber terrain with your family onboard, those mysterious Chinese bushings suddenly seem like a questionable life choice.
Good lift kits include:
- Extended brake lines (because stopping is underrated)
- Proper track bars (keeping your axle centered is nice)
- Quality shocks (your dental work will appreciate this)
What I recommend: For Jeep Wrangler owners, the Teraflex 2.5″ Sport S/T3 Suspension Lift Kit has been rock-solid reliable on my buddy’s JL. For Bronco enthusiasts, the ReadyLIFT 2.5″ SST Lift Kit gives you that perfect stance without breaking the bank. Both include everything you need for a proper setup without cutting corners.
And for the love of all things holy, get an alignment afterward unless you enjoy buying new tires every 5,000 miles.
2. Winches: Your ‘Get Out of Stupid Free’ Card
There are two types of off-roaders: those who’ve been stuck, and those who are about to be stuck. A winch is your insurance policy against becoming that guy making the “please rescue me” post in the off-road Facebook group at 11 PM.
That said, strapping a winch to your bumper comes with fine print—you’re now contractually obligated to help every stranded vehicle you encounter. It’s the unwritten code of the trail, and karma’s watching.
When shopping for winches, the math is simple: get one rated for at least 1.5 times your rig’s gross weight. If your fully loaded Rubicon tips the scales at 5,500 pounds, you’ll want at least an 8,000-pound winch.
Insider secret: That $200 Harbor Freight special that “has the same specs” as the $1,000 WARN is lying to you. It’s like comparing gas station sushi to Nobu—they’re technically both raw fish, but the consequences differ dramatically.
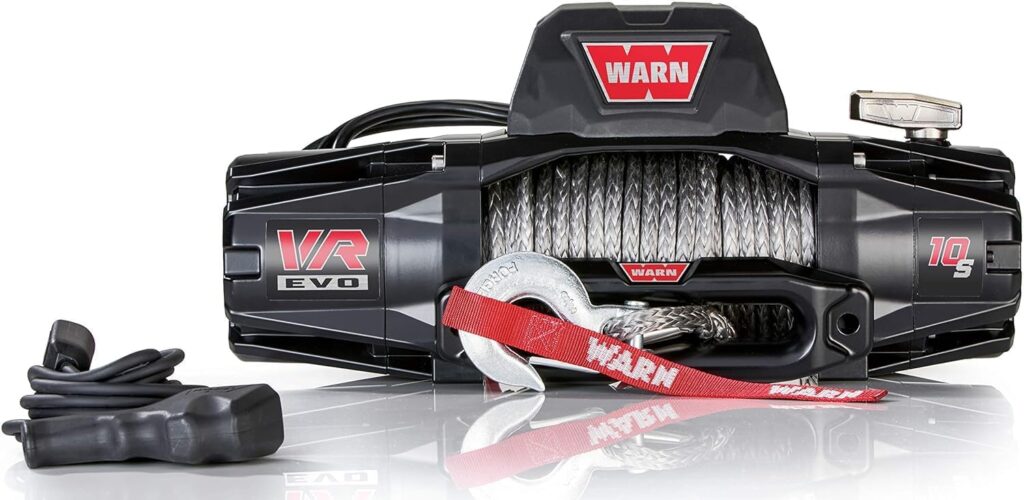
What I recommend: After testing several models (and one hair-raising failure), I swear by the WARN VR EVO 10-S. Yes, it’s pricier than some options, but its synthetic rope, sealed motor, and bomb-proof reliability make it worth every penny. For a more budget-friendly option that still performs, the Smittybilt X20 COMP has gotten several friends out of trouble without drama.
Remember to grab these winch accessories:
- Snatch block (doubles your pulling power)
- Tree saver strap (because environmentalism matters)
- Heavy-duty gloves (preserving fingerprints is nice)
Putting The Warn VR EVO 10s To The Test
Most importantly, learn how to use your winch before you need it. YouTube tutorials hit differently when you’re already stuck in a mud pit as darkness falls.
3. Rock Sliders: Because Body Damage Is Forever
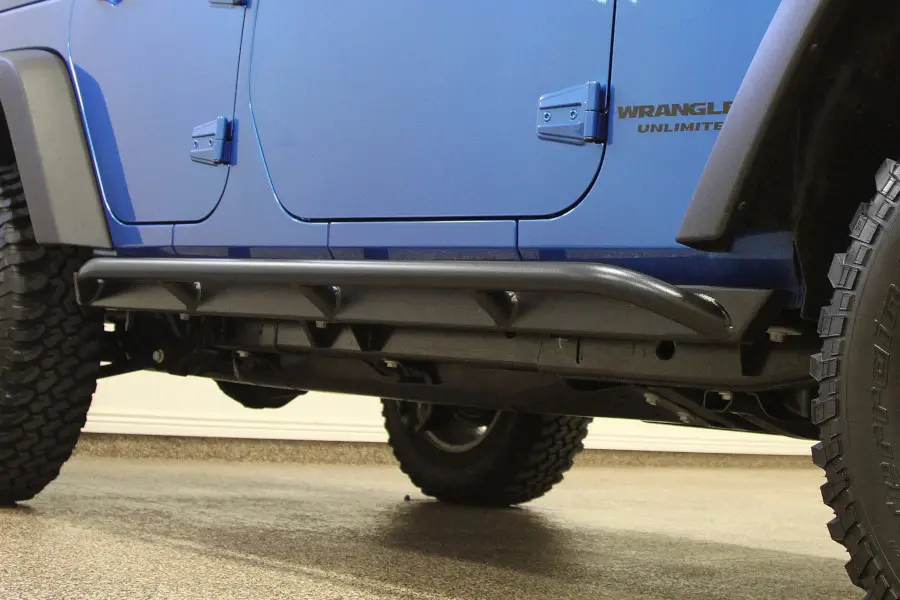
Factory running boards look nice in the dealership, but they fold like a cheap lawn chair the first time you scrape across a rock. Real rock sliders mount directly to your frame and can support the entire weight of your vehicle.
Think of rock sliders as bouncers for your rocker panels—they keep the riff-raff (rocks, stumps, that hidden shopping cart in the tall grass) from trashing your doors.
Good sliders serve double duty as steps for your vertically challenged friends and family. Nothing says “I don’t really care about you” like making your 5’2″ partner perform gymnastics to enter your vehicle.
Straight talk: The DIY sliders made from electrical conduit that your buddy’s cousin swears by? They’re about as effective as a screen door on a submarine. Proper sliders are made from DOM tubing or heavy-wall rectangular steel that can take a beating.
What I recommend: For Jeep owners, the Rock Hard 4×4 Patriot Series Rock Sliders are basically bulletproof. I’ve seen these take hits that would crumple lesser sliders, and they’re still going strong. Bronco folks should check out the White Knuckle Off Road Rock Sliders—they come with a textured step pad that’s a lifesaver when your boots are muddy.
When shopping, look for sliders that:
- Mount directly to your frame (not body mounts)
- Have a powdercoat finish (unless you enjoy the rusty look)
- Include a kick-out design to deflect obstacles
RockHard 4×4 Patriot Rock Sliders
Consider installation too—some bolt on, while others require welding. If your welding skills produce results that look like a bird’s nest made of metal, factor in professional installation costs.
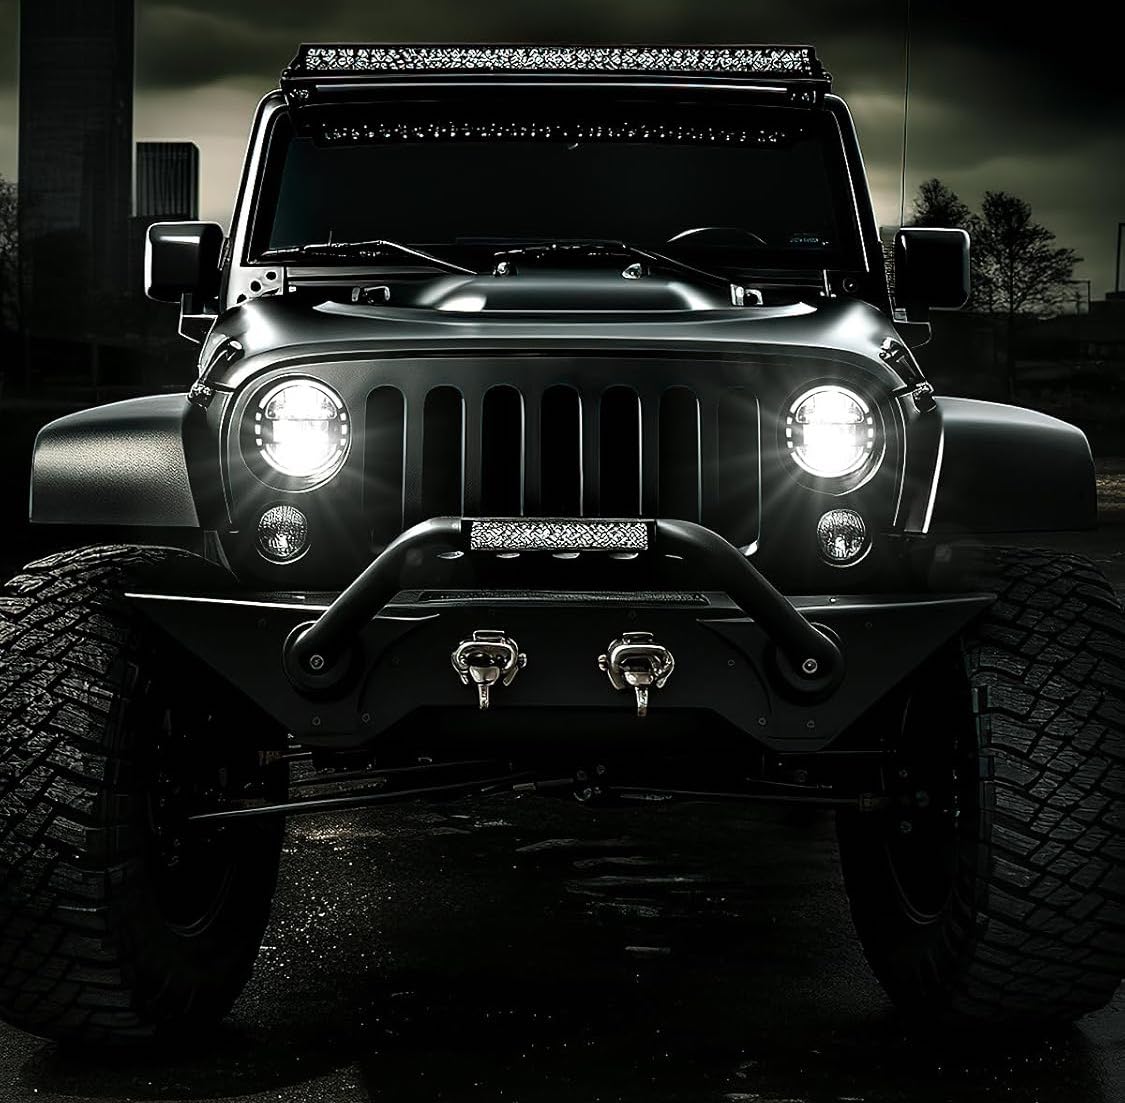
4. LED Light Bars: Turn Night Into Day (Use Responsibly)
There’s nothing quite like transforming your rig into a rolling sun. But contrary to what some believe, light bars aren’t just for looking cool in mall parking lots.
When you’re navigating a technical trail after sunset or trying to make camp before midnight, proper lighting becomes less about flexing and more about not ending up as a cautionary tale.
A quality light bar setup mixes spot beams (for seeing that deer 400 yards ahead) with flood beams (for illuminating the entire valley you’re about to descend into). The combination lets you spot both immediate obstacles and plan your route ahead.
Public service announcement: For the love of all that’s holy, wire your lights to a separate switch from your headlights. Nothing generates roadside hatred faster than accidentally blinding oncoming traffic with your 50,000-lumen face melter. That stuff causes lasting grudges against all off-roaders.
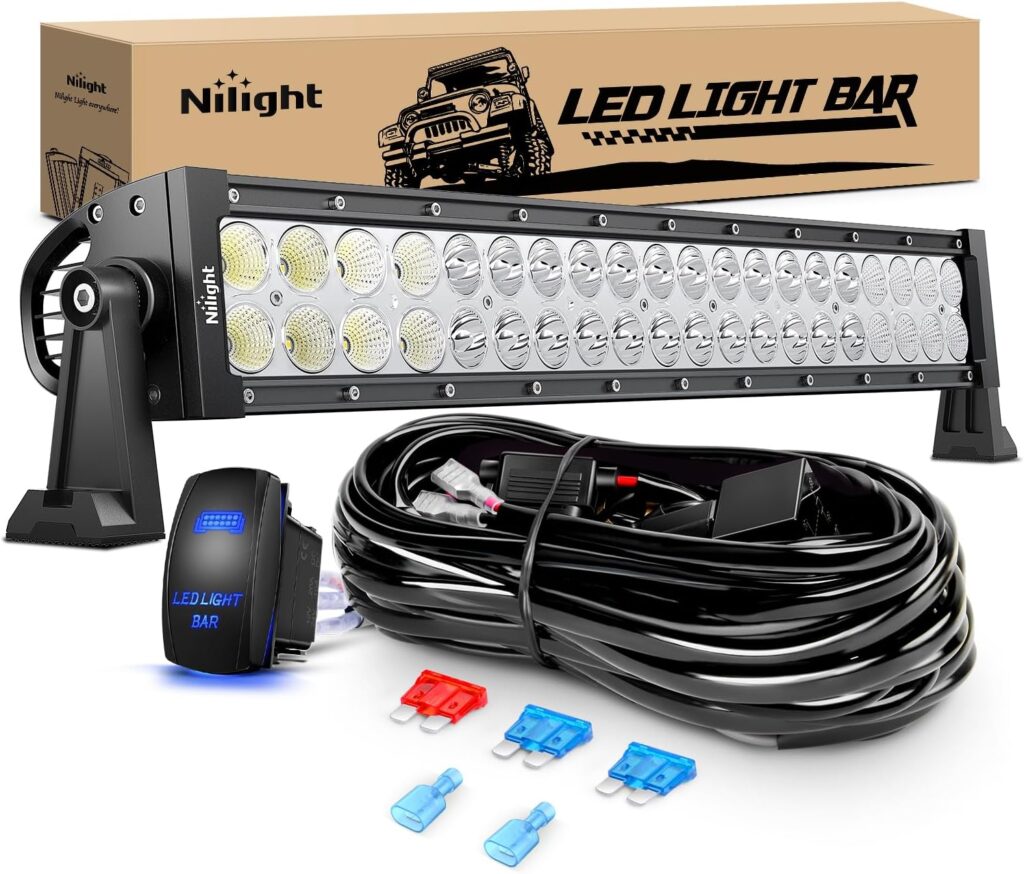
What I recommend: After trying several brands (and returning a few duds), the Nilight 22-inch Combo LED Light Bar has been surprisingly awesome for the price. For those with deeper pockets, the Rigid Industries E-Series PRO is basically the gold standard—it’s what search and rescue teams use for good reason. And don’t forget a proper wiring harness with relay like the Nilight LED Light Bar Wiring Harness Kit—it’ll prevent electrical gremlins down the road.
Consider adding these to your lighting strategy:
- Amber fog lights (cut through dust and snow like a champ)
- Rock lights (for nighttime spotting of obstacles)
- Reverse lights (backing down a trail in darkness is terrifying)
How to Install a Nilight 22″ Curved LED Light Bar
And remember—lumens aren’t everything. Cheap light bars might boast impressive numbers, but their beam pattern often resembles a drunk firefly with ADHD.
5. Snorkel Kits: For Breathing, Not Posing
Let’s clear something up: a snorkel doesn’t magically convert your Jeep into a submarine. What it does do is move your air intake from “right where all the dust is” to “slightly above where most of the dust is.”
The water-fording capability is a nice bonus, but for most of us, the real benefit is cleaner air going into our engines during dusty trail runs. Your air filter and engine will thank you.
Installing a snorkel means cutting a sizeable hole in your fender. If you’re the type who gets anxious trimming your own hair, this might be a job for professionals. There’s something uniquely sickening about making that first cut into your $50,000 vehicle.
Reality check: A snorkel alone doesn’t make your vehicle amphibious. You’ll need to address other potential water entry points like:

- Differential breather tubes (extend these upward)
- Electrical components (waterproofing is crucial)
- That mysterious hole in your floorboard from the previous owner
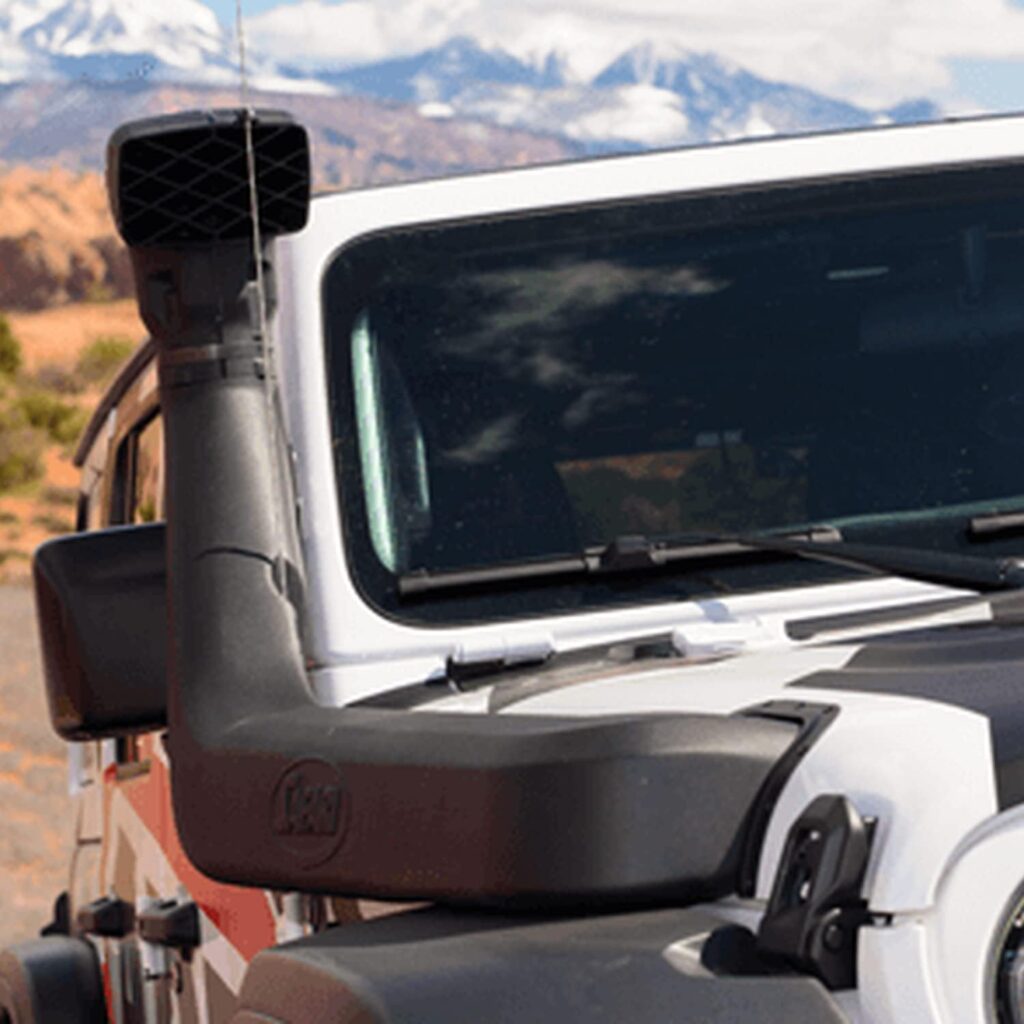
What I recommend: The ARB Safari Snorkel has been the gold standard for years—it’s what I run on my Jeep and it’s never let me down. For Bronco owners, the Airflow Snorkel Kit is gaining a solid reputation among the early adopters. Both include comprehensive installation hardware and excellent instructions that even first-timers can follow.
ARB Safari Snorkel
And please—always walk the water crossing first or watch someone else go through. That “probably not too deep” puddle has swallowed more off-roaders than the Bermuda Triangle.
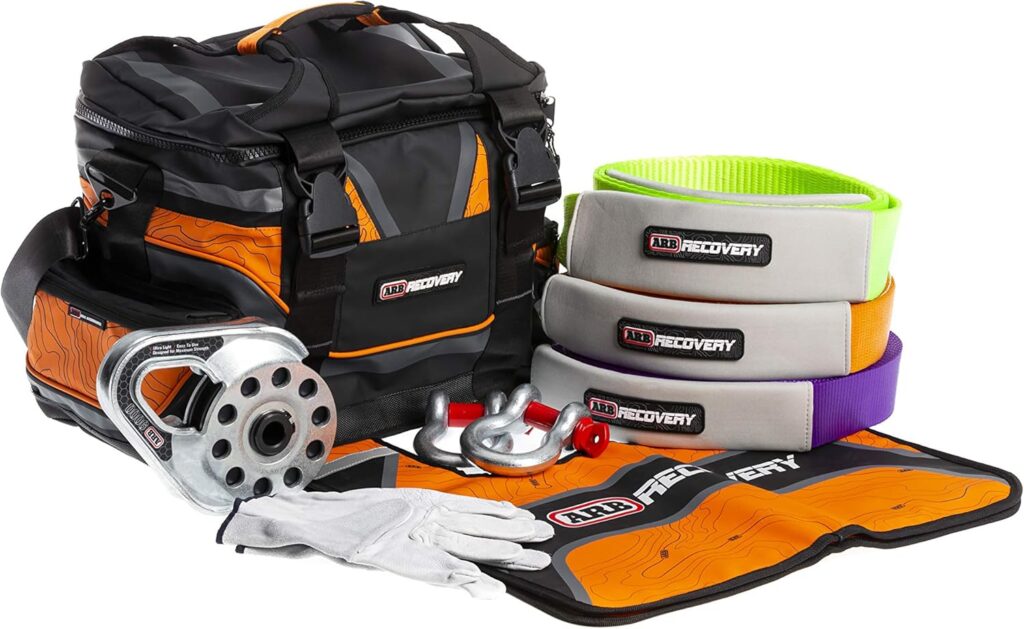
6. Recovery Gear: The Stuff You’ll Actually Use
If you only take one piece of advice from this article, make it this: invest in quality recovery gear before you need it. Nothing sours a trail day faster than realizing your bargain-bin recovery strap has the tensile strength of wet toilet paper.
Your basic recovery kit should include:
- Kinetic recovery rope (the stretchy kind that won’t take your bumper off)
- Rated shackles (not the hardware store variety)
- Recovery boards (for when winching isn’t an option)
- Gloves (because rope burn is overrated)
- Basic tool kit (adjustable wrench, socket set, etc.)
- First aid kit (optimism is not a strategy)
Hard truth: Learning proper recovery techniques is just as important as having the gear. That YouTube video you watched while half-asleep doesn’t qualify as training. Find an experienced friend or take a class before you attempt your first vehicle recovery.
What I recommend: After several underwhelming purchases, I’ve settled on the ARB Premium Recovery Kit as my go-to. It includes everything you need in one bag, and the quality is top-notch. For recovery boards, MAXTRAX are expensive but absolutely worth it—the knockoffs tend to snap at the worst possible moment (ask me how I know). And don’t forget the WARN Premium Recovery Strap—it’s saved my bacon more times than I can count.
Poly Performance – ARB Premium Recovery Kit
The least sexy but most useful recovery tool? A portable air compressor. You’ll use it every single time you hit the trails (airing down for traction, then airing up for the drive home). Get one that plugs into your 12V outlet and can fill a 35″ tire in under 5 minutes. The VIAIR 400P has been reliable for me and several wheeling buddies.

7. Tires: Where the Rubber Meets the… Everything
I’ve saved the most important upgrade for last. You can throw $20,000 at suspension and armor, but if your tires are garbage, you’re still going nowhere fast.
All-terrain tires offer the best compromise for most weekend warriors—decent off-road grip with civilized highway manners. Mud terrains look more aggressive and perform better in slop, but they’re louder than your in-laws at Thanksgiving and wear faster than cheap shoes.
Size matters: Going up in tire size gives you more ground clearance, but bigger isn’t always better. Each inch you add reduces your effective gear ratio, making your vehicle feel sluggish. Unless you’re ready to re-gear your differentials (hello, $3,000), keep it reasonable.
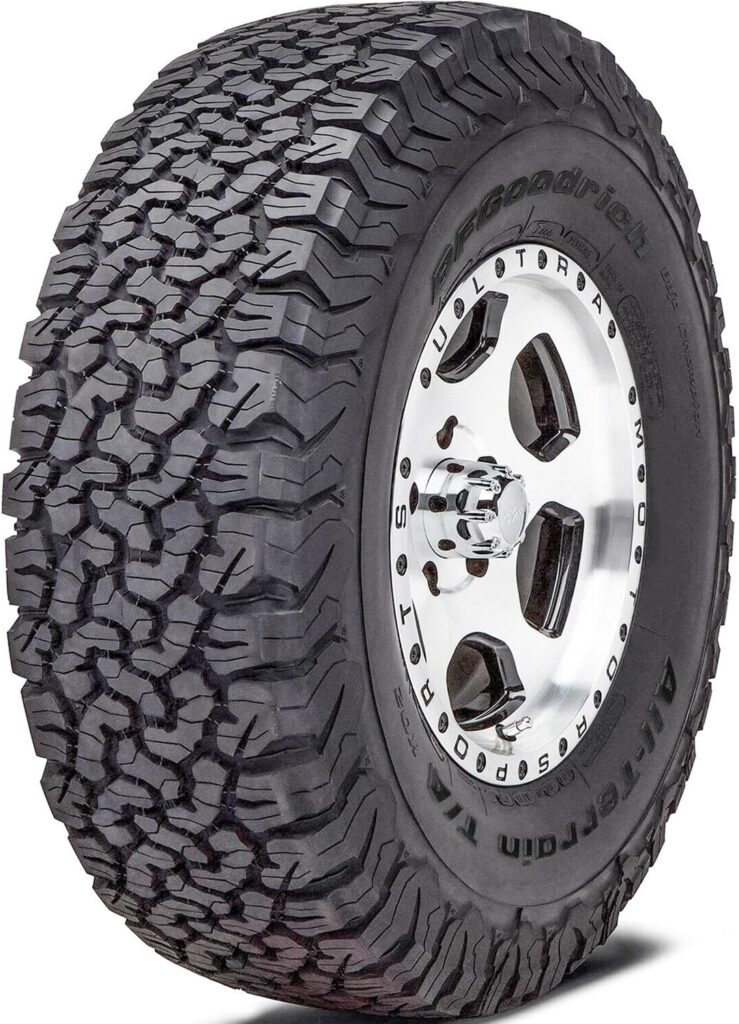
What I recommend: After trying basically every tire category on my rigs over the years, I’ve become a huge fan of the BFGoodrich All-Terrain T/A KO2s for all-around use—they’re nearly bulletproof and perform admirably in most conditions. If you’re more mud-focused, the Nitto Trail Grappler M/T offers excellent traction without the ear-bleeding highway noise of more aggressive options. For rock crawling enthusiasts, the Goodyear Wrangler MT/R with Kevlar has saved me from multiple punctures in sharp rocky terrain.
BF Goodrich All-Terrain T/A KO2 Review
When tire shopping, consider:
- Sidewall strength (puncture resistance)
- Tread pattern (open for mud, tighter for rocks)
- Load rating (matches your vehicle’s weight)
- Road noise (you’ll hear it EVERY day)
And always carry a full-size spare. That space-saver donut is about as useful off-road as flip-flops in a snowstorm.
The Bottom Line: Build With Purpose
The beauty of modifying your Jeep or Bronco is creating something uniquely yours. But here’s my parting wisdom after years of trail repairs and “I thought this would work” moments:
Build for how you actually use your vehicle, not for Instagram. That fully-decked overlanding setup looks sweet, but if you never camp more than 20 feet from your car, you’ve created a very expensive mall crawler.
Add modifications gradually as you gain experience. Each trail adventure will teach you what you actually need versus what just looks cool in the garage.
First-time build shopping list: If you’re just getting started and wondering where to put your initial budget, here’s my recommendation for the best bang-for-buck upgrades in order of importance:
- Quality all-terrain tires (BFG KO2s or Falken Wildpeak AT3Ws)
- Basic recovery kit (ARB Essentials Recovery Kit is perfect to start)
- Modest lift kit (2-3″ from Teraflex or ReadyLIFT)
- Portable air compressor (VIAIR 400P or ARB Twin)
- Frame-mounted recovery points (if your vehicle doesn’t have them)
How-To: Maximus-3 Recovery Point Install
Most importantly—get out there and use your rig! The best-built 4×4 gathering dust in the garage is being outperformed by the stock Subaru actually making it to the trailhead.
Happy wheeling, and I’ll see you out on the trails. I’ll be the one with the winch, ready to pull you out when that “shortcut” doesn’t quite work out as planned.
20+ Must-Have Offroad Jeep Accessories
About the Author: This article was written by someone who’s learned most off-road lessons the hard way—usually while covered in mud, holding a broken part, and explaining to their significant other why this is “actually fun.” Their recovery gear has rescued 37 vehicles and counting.
Disclaimer: Modifying your vehicle may affect warranty coverage. Always check with your manufacturer before making significant changes. And remember, just because you can drive through it doesn’t mean you should.